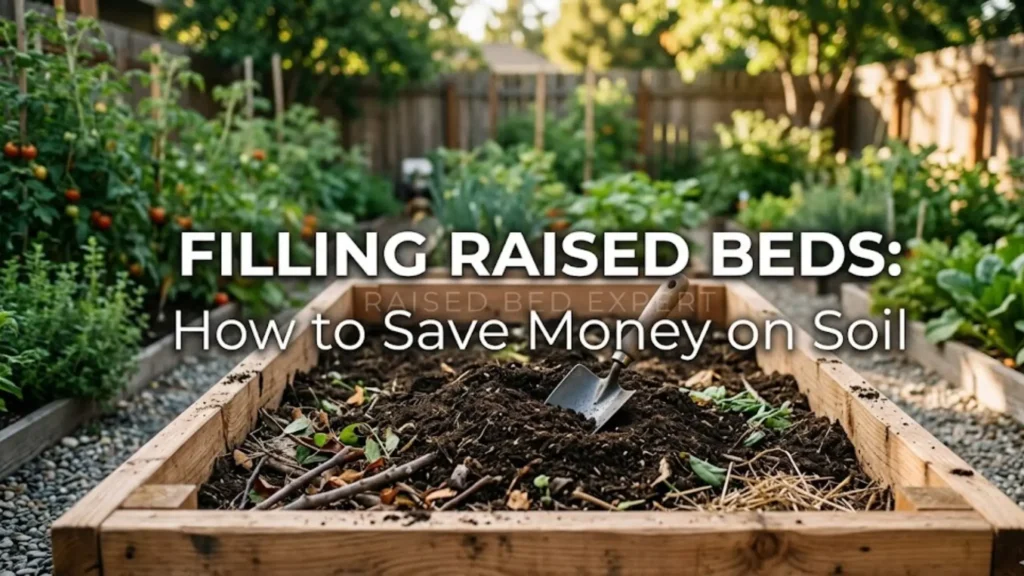
Filling raised beds requires a strategic layering approach that prioritizes soil biology and drainage, typically utilizing a “Hugelkultur” base of woody debris topped with 10–12 inches of a high-quality 60/40 topsoil-to-compost blend. This method is not only the most cost-effective way to establish a garden but also creates a self-sustaining ecosystem that mimics the forest floor, ensuring your plants have access to a slow-release reservoir of nutrients and moisture.
I’m Tina, and as a Raised Bed Expert with years of experience managing high-production gardens across the United States, I’ve seen too many gardeners fail before they even plant a seed. They either spend a fortune on “premium” bagged soil that is essentially sterile peat moss, or they fill their beds with heavy native clay that chokes plant roots. To succeed, you need to understand the physics of water movement and the chemistry of nutrient exchange.
*This video was created using NotebookLM, based on my review content, so you can listen instead of reading.
Why Filling a Raised Garden Bed Gets Expensive Fast
The primary reason filling a raised garden bed becomes a financial burden is the reliance on retail-packaged products. In the US, the “bagged soil” industry is built on convenience, not volume.

- The Math of Retail: A standard 4’x8’ bed that is 2 feet deep requires approximately 64 cubic feet of material. Most retail bags are 1.5 cubic feet. You would need over 40 bags. At an average price of $8 to $12 per bag, you are looking at nearly $500 for a single bed.
- The Shipping Trap: When you buy bagged soil, you are paying for the plastic, the marketing, and the carbon cost of trucking heavy wet dirt across the country.
- The “Premium” Mirage: Many products labeled “Raised Bed Mix” are simply 70% peat moss or coconut coir with a handful of perlite. While lightweight, these mixes lack the mineral density required for long-term plant health and require constant supplemental fertilization.
The Goal of Filling a Raised Garden Bed
The objective isn’t just to fill space; it’s to engineer a Rhizosphere—the thin layer of soil directly influenced by root secretions and microorganisms. A successful fill must achieve three scientific benchmarks:
1. Optimal Cation Exchange Capacity (CEC)
CEC is the soil’s ability to hold onto essential nutrients like Calcium, Magnesium, and Potassium. Pure peat or sand has a low CEC; nutrients simply wash away. By incorporating high-quality compost and mineral-rich topsoil, you create “magnetic” sites in the soil that hold nutrients until the plants need them.
2. Porosity and Gas Exchange
Roots breathe oxygen and exhale carbon dioxide. If your soil is too dense (like pure topsoil), the roots suffocate. If it’s too porous (like pure perlite), it won’t hold enough water. You are aiming for a “loamy” texture that provides a balance of macropores for air and micropores for water.
3. Answer: How full should I fill my raised garden beds?
You should fill your beds to within 1 to 2 inches of the top rim. Many beginners make the mistake of leaving 6 inches of headspace. This creates a “microclimate” trap where airflow is restricted, increasing the risk of fungal diseases like powdery mildew. Furthermore, as organic matter settles, that 2-inch gap will naturally increase to 4 or 5 inches by the end of the first season.

What NOT to Use When Filling a Raised Garden Bed
Avoid these common mistakes to prevent crop failure and soil contamination:
")
- Fresh Wood Chips on Top: Never mix fresh wood chips into the top 10 inches of soil. Microbes will consume all available nitrogen to break down the carbon in the wood, leaving your plants yellow and stunted (a process known as Nitrogen Tie-up).
- Rocks or Gravel for “Drainage”: This is a persistent myth. Placing rocks at the bottom of a container creates a “perched water table.” Water does not move easily from fine-textured soil into coarse rocks. Instead, it pools at the junction, rotting your roots.
- Uncomposted Manure: Fresh “hot” manure contains high levels of ammonia and salts that can chemically burn tender roots. It also frequently carries weed seeds and pathogens like E. coli.
- Treated Lumber Scraps: While modern pressure-treated wood (ACQ) is safer than the old arsenic-based (CCA) wood, it still contains copper-based fungicides that can harm the beneficial mycorrhizal fungi in your soil.
The Cheapest Way to Fill a Raised Garden Bed Using Layers
To answer the most frequent question from the image: What is the cheapest way to fill a raised bed? The answer is the layering method (Hugelkultur). This allows you to fill up to 60% of the bed’s volume for free using yard waste.
")
The Science of the Layers:
- Bottom Layer (The Carbon Base): Use large logs and thick branches. Hardwoods like Oak, Maple, or Birch are best. They decompose slowly, acting as a “moisture battery” that releases water during droughts.
- The “Green” Layer: Add fresh grass clippings, green leaves, or vegetable scraps. This provides the nitrogen boost needed to kickstart the microbial breakdown of the logs below.
- The Buffer Layer: Add a layer of cardboard or inverted sod. This prevents your expensive topsoil from falling into the air pockets between the logs.
- The Root Zone (Top 10-12 inches): This is the only layer where you should use high-quality material. A mix of 60% screened topsoil and 40% aged compost is the gold standard.
Cheap Compost Ideas: Sourcing “Black Gold”
If you want to keep costs down, you cannot rely on bagged compost. Here are three expert-level sourcing strategies:
- Municipal “Give-Back” Programs: Many US cities collect yard waste and compost it at scale. They often offer this compost for free or for $15–$20 per truckload. Caution: Ask if they test for persistent herbicides like Aminopyralid.
- Local Equestrian Centers: Horse manure is a fantastic resource. Many stables are desperate to get rid of it. Ensure it has been aged for at least 6–12 months until it looks and smells like dark earth.
- Arborist Wood Chips: Use an app like “ChipDrop” to get a free load of wood chips. While you shouldn’t put them inside the top layer, you can age them in a pile for a year to create incredible “fungal-dominant” compost.
How to Fill a Raised Garden Bed Over Time to Save Money
For the beginner gardener, you don’t need a “perfect” bed in year one. You can use a “fill-as-you-go” strategy:
- Year 1: Fill the bottom half with woody debris and only fill the top 6 inches with soil for shallow-rooted crops like lettuce, spinach, and herbs.
- Year 2: As the logs settle, add 4 inches of compost and plant medium-rooted crops like peppers and bush beans.
- Year 3: The bed is now fully established with a deep nutrient base, perfect for heavy feeders like tomatoes and pumpkins.
This approach spreads the cost over three years while allowing the soil biology to mature naturally.
Scenarios and Expert Solutions
| Situation | Problem | Solution |
|---|---|---|
| Beds on Concrete | Poor drainage and heat reflection. | Use a 3-inch layer of coarse sand at the bottom and increase peat/coir to 40% to prevent the bed from drying out too fast. |
| New Construction Sites | Native soil is compacted “fill dirt.” | Do not mix native soil into the bed. Use a 100% imported mix to avoid bringing in subsoil pathogens. |
| High Wind Areas | Soil dries out and blows away. | Fill the bed 3 inches below the rim and use a heavy straw or wood chip mulch to protect the surface. |
Tina’s Perspective: The “Squeeze Test” and Soil Soul
In my experience, the biggest mistake people make when filling raised garden beds is ignoring the “life” in the soil. Soil isn’t just a medium to hold the plant up; it’s a living organism.
The Squeeze Test: Grab a handful of your soil mix and squeeze it.
- If it crumbles immediately, it lacks organic matter (add compost).
- If it stays in a sticky, hard ball, it has too much clay (add perlite or coarse sand).
- If it holds its shape for a second but crumbles when you poke it, it’s perfect.
My personal philosophy? I never buy soil that doesn’t have a visible presence of earthworms or fungal hyphae (white threads). If the soil looks “too clean,” it’s probably been steam-sterilized, which means you’ll have to work twice as hard to feed your plants manually.
Final Evaluation: Is Layering Right for You?
This guide is for you if:
- You are building beds deeper than 12 inches.
- You have access to fallen branches, leaves, or local bulk soil.
- You want a garden that requires less water and fertilizer over time.
This guide is NOT for you if:
- You are using shallow “table-top” beds (less than 8 inches deep).
- You live in an area with a massive termite infestation (don’t put large logs against your house).
- You are gardening in small fabric grow bags, which require a much lighter, soil-less potting mix.
Pingback: Beat Food Inflation 2026: High-Yield Raised Bed Tips